
So, I have a Pinterest, and I keep track of my popular pins. One of my popular pins seemingly every week is this Maple Caramel Carrot Cake. There is someone almost every week that is repinning this onto one of their boards. After seeing this month after month, I decided that it was high time that I actually tried making the cake to see how it would turn out. That’s what this post is about.
Here is the recipe from the pin:
INGREDIENTS
Carrot Cake:
- 2 cups all-purpose flour
- 2 tsp baking powder
- 1/4 tsp baking soda
- 3/4 tsp salt
- 1 1/2 tsp ground cinnamon
- 3/4 tsp ground nutmeg
- 1/2 tsp ground ginger
- pinch ground cloves
- 1 1/4 cup vegetable oil
- 1 cup dark brown sugar
- 1 cup granulated sugar
- 4 large eggs room temperature
- 1 1/2 tsp vanilla
- 3 cups grated carrots lightly packed, approx. 4 large carrots
Maple Caramel:
- 1 cup pure maple syrup
- 1/2 cup heavy cream
- 1 Tbsp unsalted butter
Cream Cheese Frosting:
- 2/3 cup unsalted butter room temperature
- 4 oz cream cheese full fat, room temperature
- 2 cups powdered sugar sifted
- 1 tsp vanilla
Assembly:
- 4 Tbsp pure maple syrup
- 1/4 cup pecans chopped, toasted
I went to the store and picked up the ingredients (well, almost all of them — we’ll get to that)
I started by assembling the dry ingredients:


As you can see instead of cinnamon, nutmeg, ginger, and cloves, I only have one bottle — pumpkin pie spice. Surprisingly, those are the ingredients for pumpkin pie spice. So, one bottle will do! I did need to worry about how much to put in though. I was thinking of calling my sister because she is good at all that figuring. Me? Not so much. I decided to just wing it. Instead of putting all figures into some calculation, I put in 2 T of pumpkin pie spice.
The picture above right is all the dry ingredients in the mixing bowls getting ready to be whisked together.
Now onto the wet ingredients.

Eggs, vanilla, white sugar, brown sugar, vegetable oil
Here are all the wet ingredients assembled together. I kind of cheated in this picture because I have the “good – picture ready” brown sugar instead of the gnarly hard as a rock little bag of dark brown sugar that I used. I put the brown sugar in a microwave safe container and placed a damp paper towel on it, then zapped it in the microwave for 20 seconds to re-soften it. It had lumps, so I put the hard-ish lumps in with some of the oil and white sugar into a Magic Bullet® mixer, tossed in the eggs, and whipped the lumps out.

Wet ingredients in the bowl
Here are the wet ingredients assembled in another bowl. (This was before the lumps were scooped out and Bulleted away.) I tried to mix this by hand, but the lumps were getting on my nerves. They needed to go. At this point, I had not actually preheated the oven yet, so I did. I wasn’t sure how long all my assembly was going to take and it’s hot here, so I was going to turn the oven on as late as possible.
Now comes assembly time! I purchased already shredded carrots to make sure there were no shredded fingers in the cake with the shredded carrots. See how nice the wet ingredients look? Magic Bullet®.

wet ingredients, dry ingredients, shredded carrots
I ended up buying too many carrots. I am not good at eyeballing how much I need. I used one bag for this cake.

carrot cake batter poured into pans
Here is the carrot cake batter poured into pans. What pans did I use? I used foil throw away pans that were under $2 for 3 at the store. I greased and floured the pans and used a cookie sheet under it because I wasn’t sure if it was going to cook over, or if the pans would get weird because they were foil. They were fine: I didn’t actually need the cookie sheet. In the oven they go. Now onto the caramel.
Okay, I’m a dork and I used to go to the Geauga County Maple Festival in Chardon, BUT I wasn’t interested in buying REAL maple syrup because it’s expensive, and I have no use for it after this recipe. I picked up some cheap not so maple pancake syrup from the store. Then began to fret because it wouldn’t get thick and sit right on the cake. So, I looked up a caramel recipe instead and made that.


This is a cup of sugar and 1/3 c of water in a saucepan. The idea is to NOT STIR this and put it on medium heat until the sugar melts and it gets all bubbly good. To stop the sauce from cooking, you pour in 2/3 cup heavy cream.

")

As the old cartoons would say, “Fricka Fraka Bricka Bracka” Why can’t I open this damn thing normally. It reminded me of the nightmare at lunch trying to get the little carton of milk open without spilling it all over the place. I gave up after trying the one side and just ripped the whole top open. Think you’re going to show me up Mr. Heavy Cream! Oh, and I didn’t need the whole amount for this recipe. What’s a girl to do? Well, a handy dandy chip clip will close that right up for ya! I ended up pouring that into a cup of coffee I made.


At this juncture, I can hear my grandmother sighing. “Girl, you have no patience! You needed to heat that longer so it would actually brown. It’s too light. It doesn’t look like the picture.”
Oh well.
I finished that with the heavy cream and 2 T of butter then called it done. Oh, and for good measure, I threw in some pancake syrup in case there was even a hint of some kind of maple in there.
So, it’s light. It’s still tasty. Now it is frosting time!

powdered sugar, butter, cream cheese
The frosting is simply powdered sugar, butter, and cream cheese. Yum! Apparently, I didn’t think it was important to take a picture of the frosting. Just picture a small round bowl with white delicious cream cheese frosting in it. Time to take the cake out!
sun photo
The carrot cake looks lovely (better than that seasoned cookie sheet), and I let these sit in the pan for 10 minutes before I put them on plates to finish cooling. This had to happen in the fridge because, as stated earlier, it’s hot here.

cooked carrot cake

carrot cake cooling on plates
As you can see, the foil baking rounds created a lovely edge for the cake. Now to level the layers, so the cake sits evenly.


After leveling the cake, I took a close-up photo to show the texture of the cake. Also, with the leveling, I got to sample everything before it was assembled into the finished cake. Bonus!

finished carrot cake
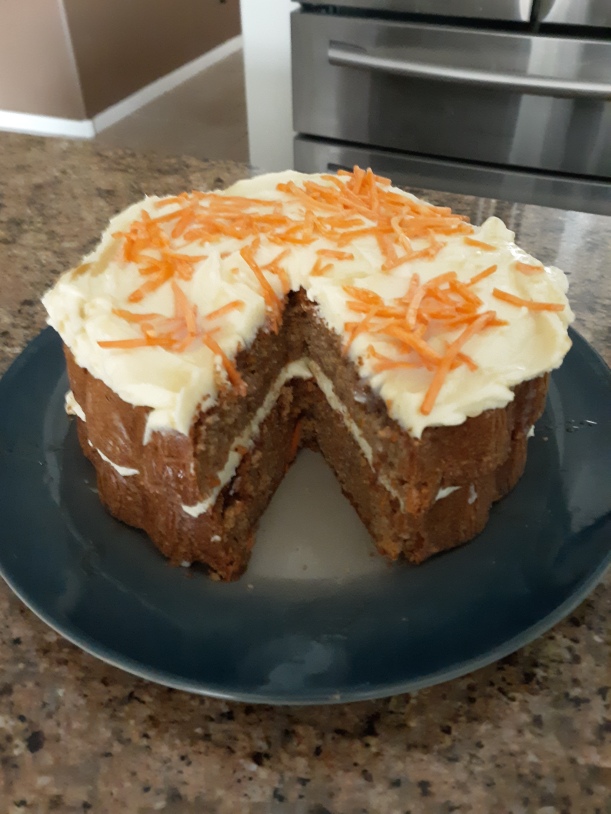
sliced finished carrot cake
I frosted the bottom layer and drizzled some caramel on it, then put on the top layer repeating the process, and finished it off by sprinkling some shredded carrots on top. Obviously, my grandmother would be mentioning that the caramel could have been darker. I also drizzled some pancake syrup on it again for the desired possible hint of maple effect. It does not look like the photo from the pin, but we’ll just say I made it my own from the creative end. Oh! I almost forgot; you’ll notice there are no pecans on the cake. Yeah, I forgot to buy those. Still delicious!
